Adding fields to the Contact Form
Once the Contact Form is created you'll be able to add additional fields.
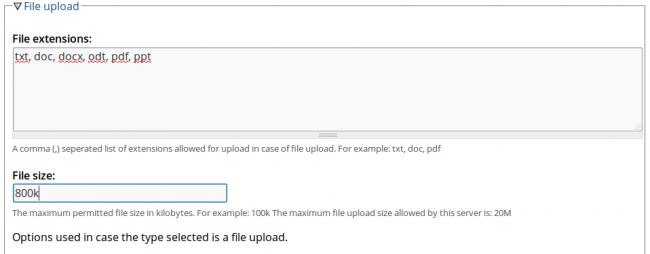
Click on the Edit tab of the contact form page. Click on the fields Fields tab. Click on the Add Field tab. Name your field and provide a description (optional) to let know the user the purpose or instructions for the field. Choose the Type of your field. whether it is: Check box, Color selector, Date picker, File upload, Hidden, Other, Password, Radio box, Select, Text, Text area. Input limit: The maximum amount of character the user can insert if this is a text or textarea field. 0 for unlimited. Default value: You can set a default value for a text, text area, password, hidden, other or a list like select, radio o checkbox in this field. In the File upload section are the File extensions and File size options. If you choose your Field type to be a File upload field, write in the File extensions field a comma (,) separated list of extensions allowed for upload.
*Example*: txt, doc, pdf.
And, in the File size field specify the maximum permitted file size in kilobytes.
*Example*: 100k
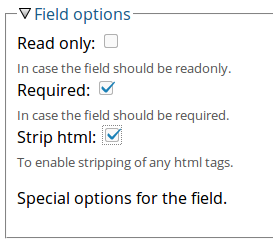
Field options: Check all the options that apply for your field. If you want your field to be Read only, Required and/or Strip html for stripping any html tags.
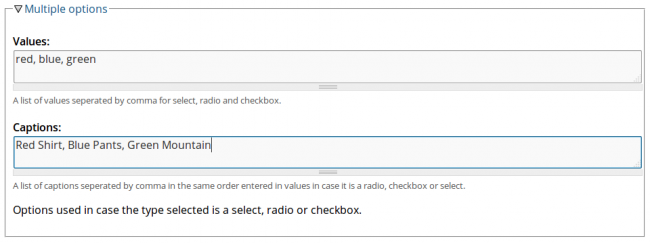
Multiple options: If you selected your field type to be select, radio or checkbox, write down the list of Values and Captions separated by commas for the options.
Then, click Save.
|
|
|


